
Happy New Year guys!
With the festive season over, it's time to get your party frocks on, raise a glass with loved ones and see the New Year in in style. 2016 has been some year and I think we are all ready for a fresh start, so to celebrate a new beginning I thought I'd show you a little DIY party decoration that's perfect for any New Years Eve get together.

You will need:
Tissue paper ( x3 sheets of various colours)
Scissors
Sting or ribbon
Tape


Start by taking one sheet of tissue, I chose gold, and fold it in half along the middle so both edges meet and you have a fold along the longest part of the tissue. Then start at one end and fold your paper up along it's sides, I just followed the folds already made from when it was packaged.
Make cuts from the bottom of your paper up towards the top fold, leaving 2-3 cm gap from the top so you don't cut the fold. Make as many cuts as you want and making sure to cut through all layers of tissue, mine were about 2 cm apart.


For the second layer, I chose an different colour tissue paper, this will give the garland the ombre effect we want. As before, fold the tissue paper in half then refold along the width. Cut a third off the bottom of this sheet to make it shorter than the gold sheet before. Make slits from the bottom to the top as before, leaving a 2-3cm gap before the fold at the top.
Repeat for the last sheet of tissue, cutting it in half to make it shorter than the black sheet of tissue that you used before.


Next open out your sheets and layer them on top of each other, face down with the longest on the bottom and the shortest on top. Line up the center folds and place a length of string double the length of the garland in the center fold. Secure with a little tape and fold back over the sheets one at a time, using a bit of tape in between each layer if you need to keep it in place.


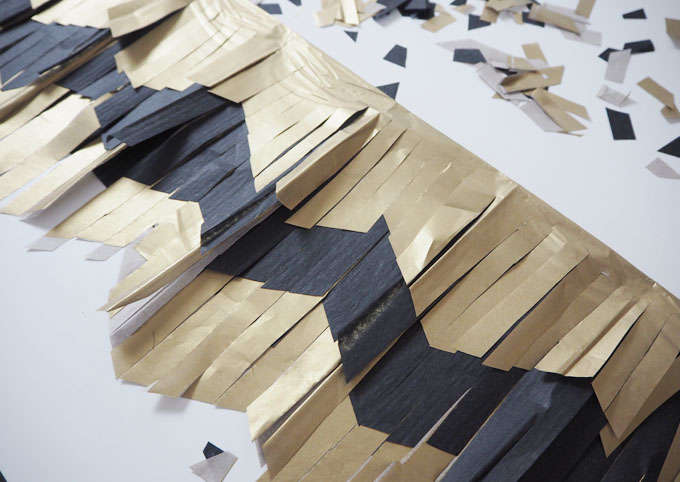
You can either keep your garland at this length or trim each layer to make chevron shapes like I did. This looks super stylish with the different colour layers of tissue coming through. The best bit about this part is that you can save up the left over clippings to use as party confetti too. All that is left to do is hang up the garland using the string on each side, and dance the night away.
You can add as many layers of tissue as you like, or why not try a variety of colours to match your party theme!? Either way this simple & quick DIY will help you add instant glamour to your New Years Eve party.


How will you be celebrating the start of 2017? Let me a comment below or tweet me here.
Hope you all had a Merry Christmas and Happy New Year!
Here's to an amazing 2017... Cheers!
No comments
Post a Comment